
Martin Simpson's new Tirga Mhor - a build thread
A few weeks ago, Martin took delivery of his new Tirga Mhor. Working with him on this build has been fantastic. I wrote a build thread for the Acoustic Guitar Forum which I wanted to share with you all here, hope you enjoy!
____________________________________
Part One - The Beginning - July 2020
As some of you may know Martin and I have been working together for the last 4/5 years on guitar ideas. I wrote a blog last year on this here.
His last Tirga Beag was the first guitar to have my Compression Braces and opened my eyes to the opportunities that a responsive back can create in an instrument.
At last years Simpson Guitar workshop there were three Tirga Mhors there, all had slight developments in construction and different wood combinations. Although differing in construction and wood, they all shared the same Tirga Mhor philosophy; powerful, wide dynamic range with lots of note separation. Being able to pull back or adjust the steeliness was my goal.
After the workshop the phone rang and there was a very excited Martin on the end, “we have to build another one!”. We discussed what was good about all three and how they differed.
After about an hour we settled on African Blackwood/Adirondack for the body and to this point of writing, I don’t know what neck wood I’ll choose as I want to hear the body closed first. The major reasons for these wood choices was to capture the warmth of Ian’s and the overtones of Pete’s. Martin wants as much power and spit as he can get. I don’t want it to be steely, more a rich and very full sound that I have heard in recent Tirga Mhors, hence neck choice is still in the balance.
This is one of the latest Tirga Mhors to leave the workshop, played by the incredible Stuart Ryan. This is a very similar spec that Martin and I discussed as a starting point for this build.
Part Two - The Wood - July 2020
Once we had made the decision on wood choice and with my ABW stocks being a little low at that point, I knew exactly who I had to get in touch with…
In early 2019 I came across the brilliant Sound and Fair, a timber trading company which supplies wood exclusively from FSC-certified, community managed forests in Tanzania. They work in close partnership with the local communities who manage the forest reserves and retain 100% of the timber revenue. In 2016, Sound and Fair secured investment to build a log processing and timber production facility in partnership with the Nanjirinji village, close to the primary FSC certified forests. Completed two years ago, it continues to provide additional local employment opportunities and enables the company to produce wholesale volumes of timber for local and international markets.
I got right on the phone to Neil Bridgeland, who manages the UK and international trading, sales and marketing elements of Sound and Fair - ‘Neil, any chance of some ABW I could buy from you to re-saw into sets?’. Two weeks later I had three incredible billets sitting in my workshop, all 100% FSC-certified. Next challenge, cutting them…


As I’m sure many of you know, ABW is incredibly hard, certainly not something I would even attempt to process in my workshop! I spoke with my friend and long-term wood supplier, Steve Keys of Keystone Tonewoods, if anyone could recommend somebody to cut the wood it would be him. Steve pointed me in the direction of Hamish Low. One half of Adamson and Low Cabinet Makers, he is also a Bog Oak specialist and was Project Director on the incredible Fenland Black Oak Project, he knows everything there is to know about processing wood! Hamish kindly agreed to process the billets for me and although re-sawing the wood at the dimensions required was quite an ask, he did the most brilliant job and I can’t thank him enough!


Part Three - The Build Starts - July 2020
Once the specs were decided, first thing was the prep. Here is the spec list for Martin’s Tirga Mhor:
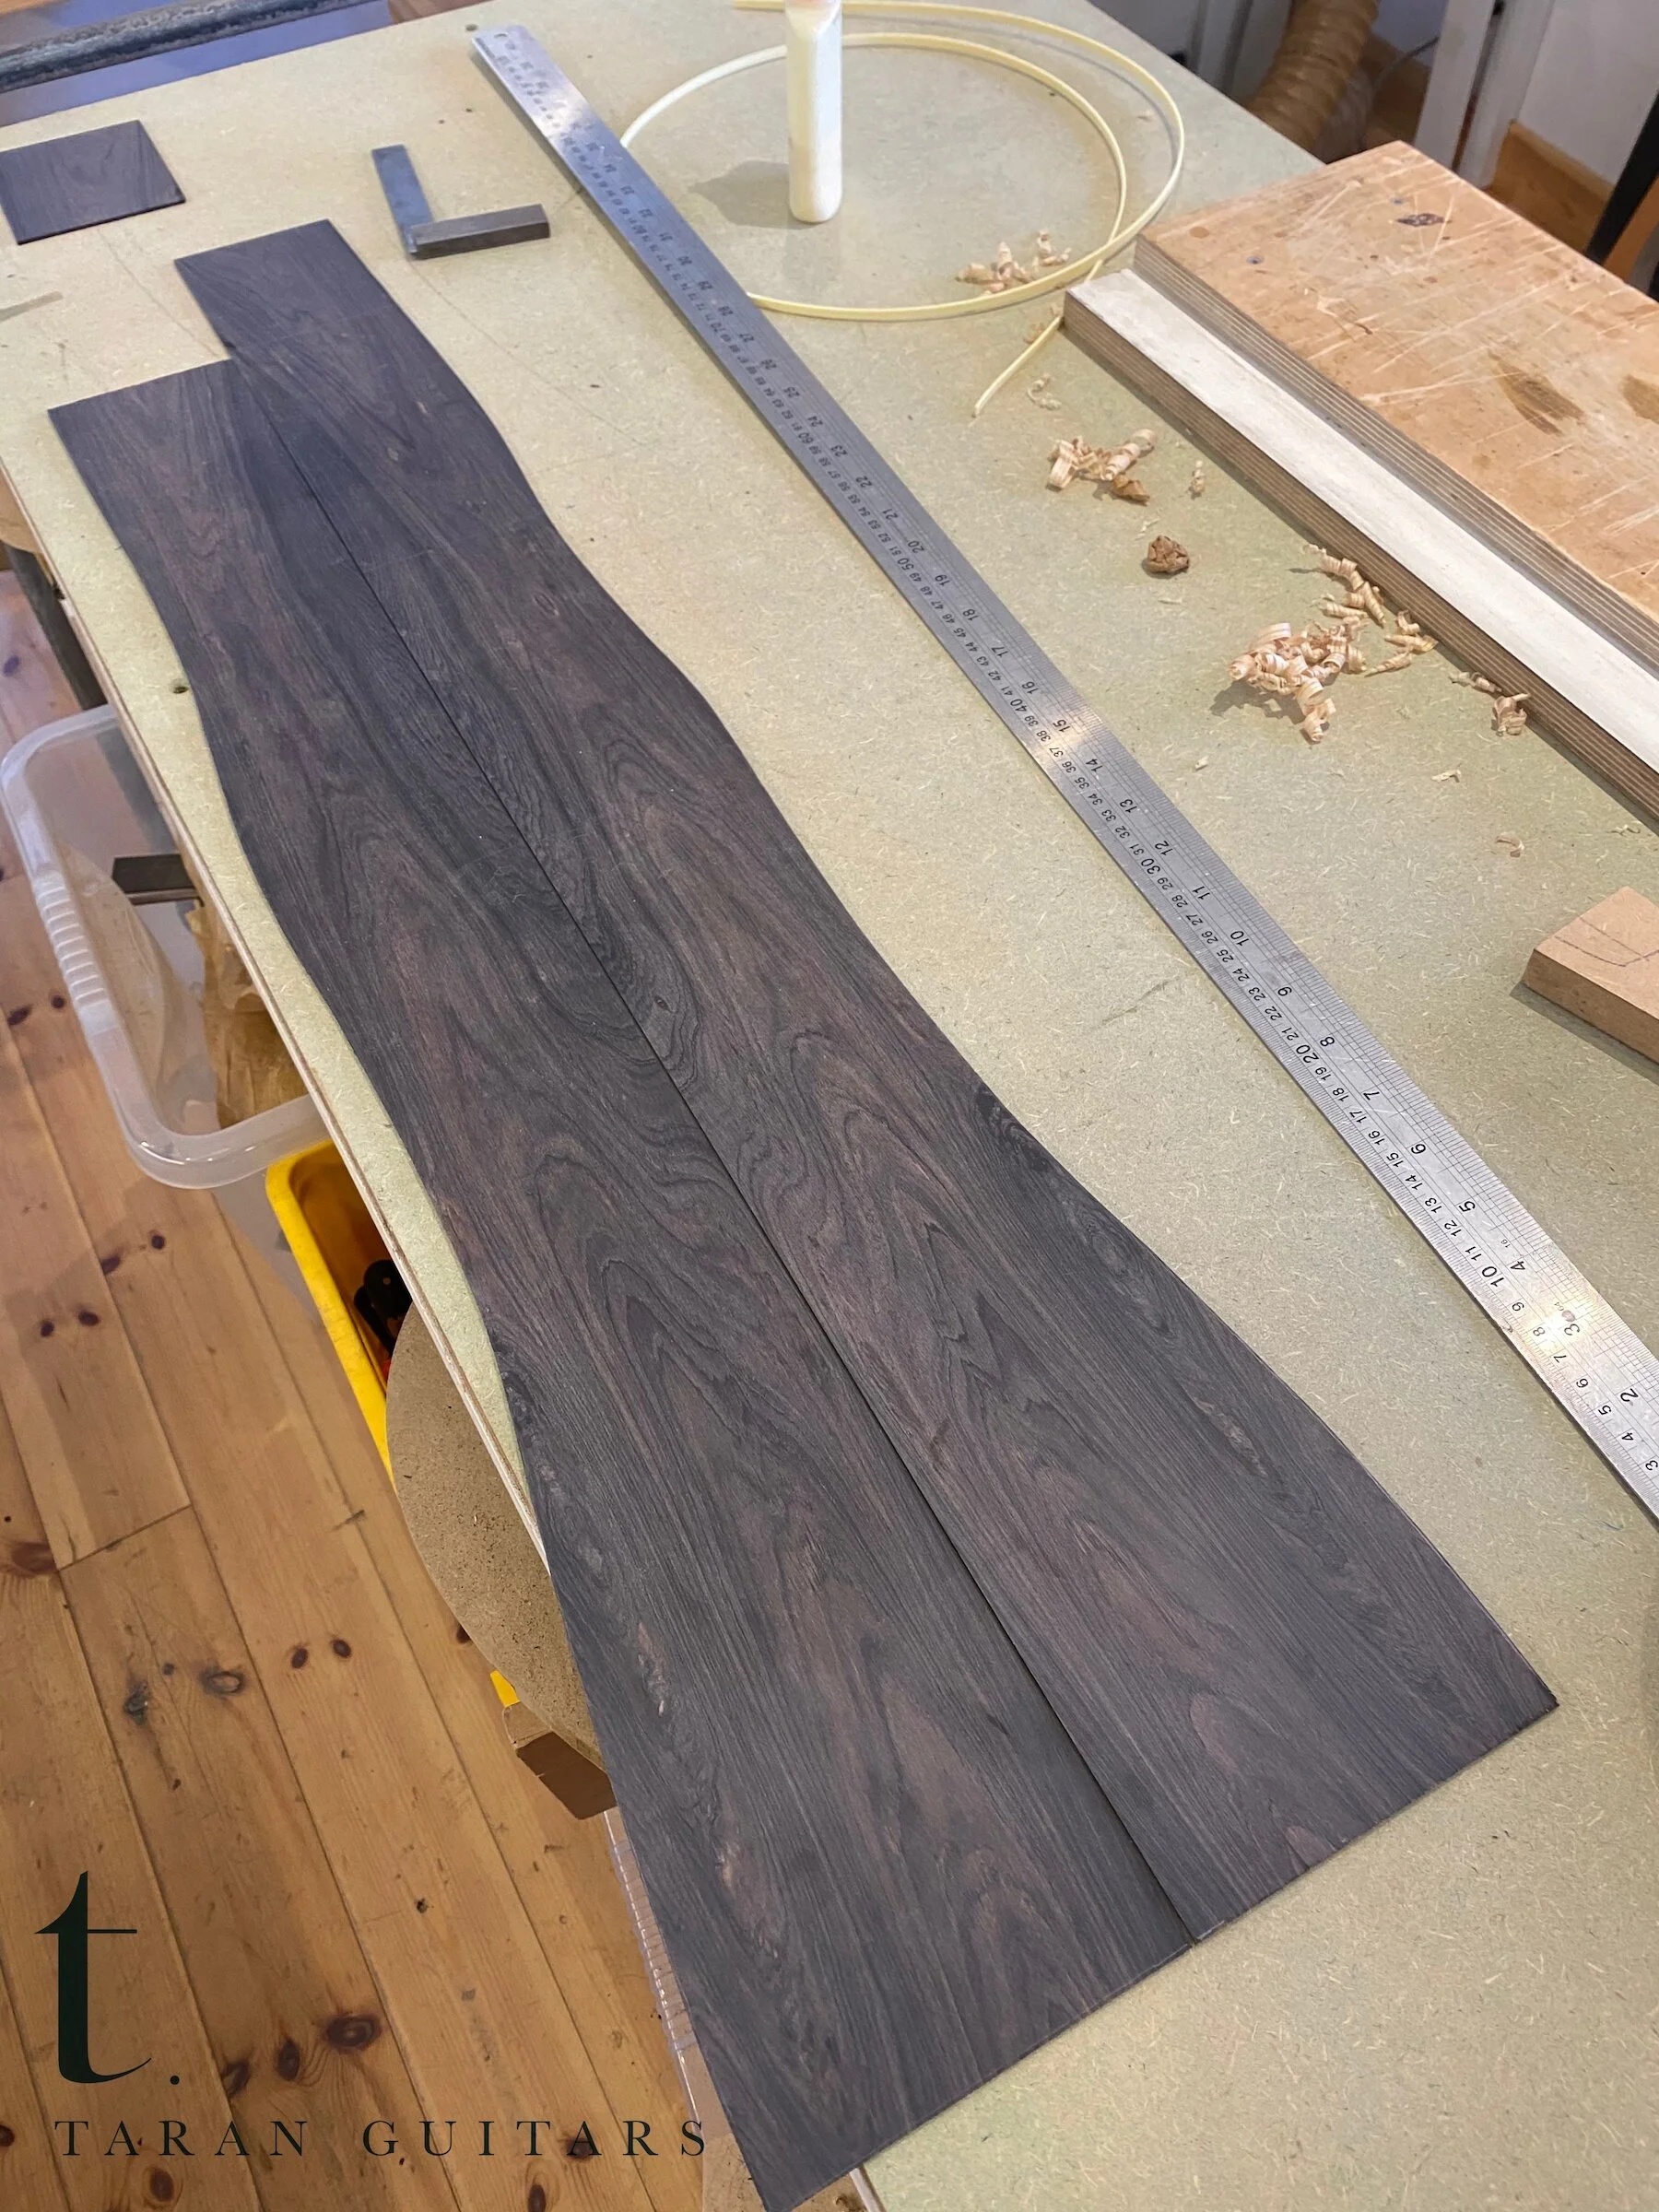
• African Blackwood 100% FSC 2-piece Back and Sides
• Artist Grade+ Adirondack Spruce Top
• Taran Guitars Compression Braces
• Fully kerfed sides in Western Red Cedar
• Neck in Wenge
• Fretboard in African Blackwood with gold fret-markers
• Fanfret - scale 660mm - 645mm | 6th Fret perpendicular fret
• Fret wire in Evo Gold with semi-hemispherical fret-ends
• Bound Sound Port
• Bevel, Headstock and Rosette in Hot Sand Faded Scottish Burr Elm
• Gotoh 510 tuners 21:1 ratio in gold with black buttons
• Nut 46.5mm
• String spacing at saddle 61mm
• String weight 12-56
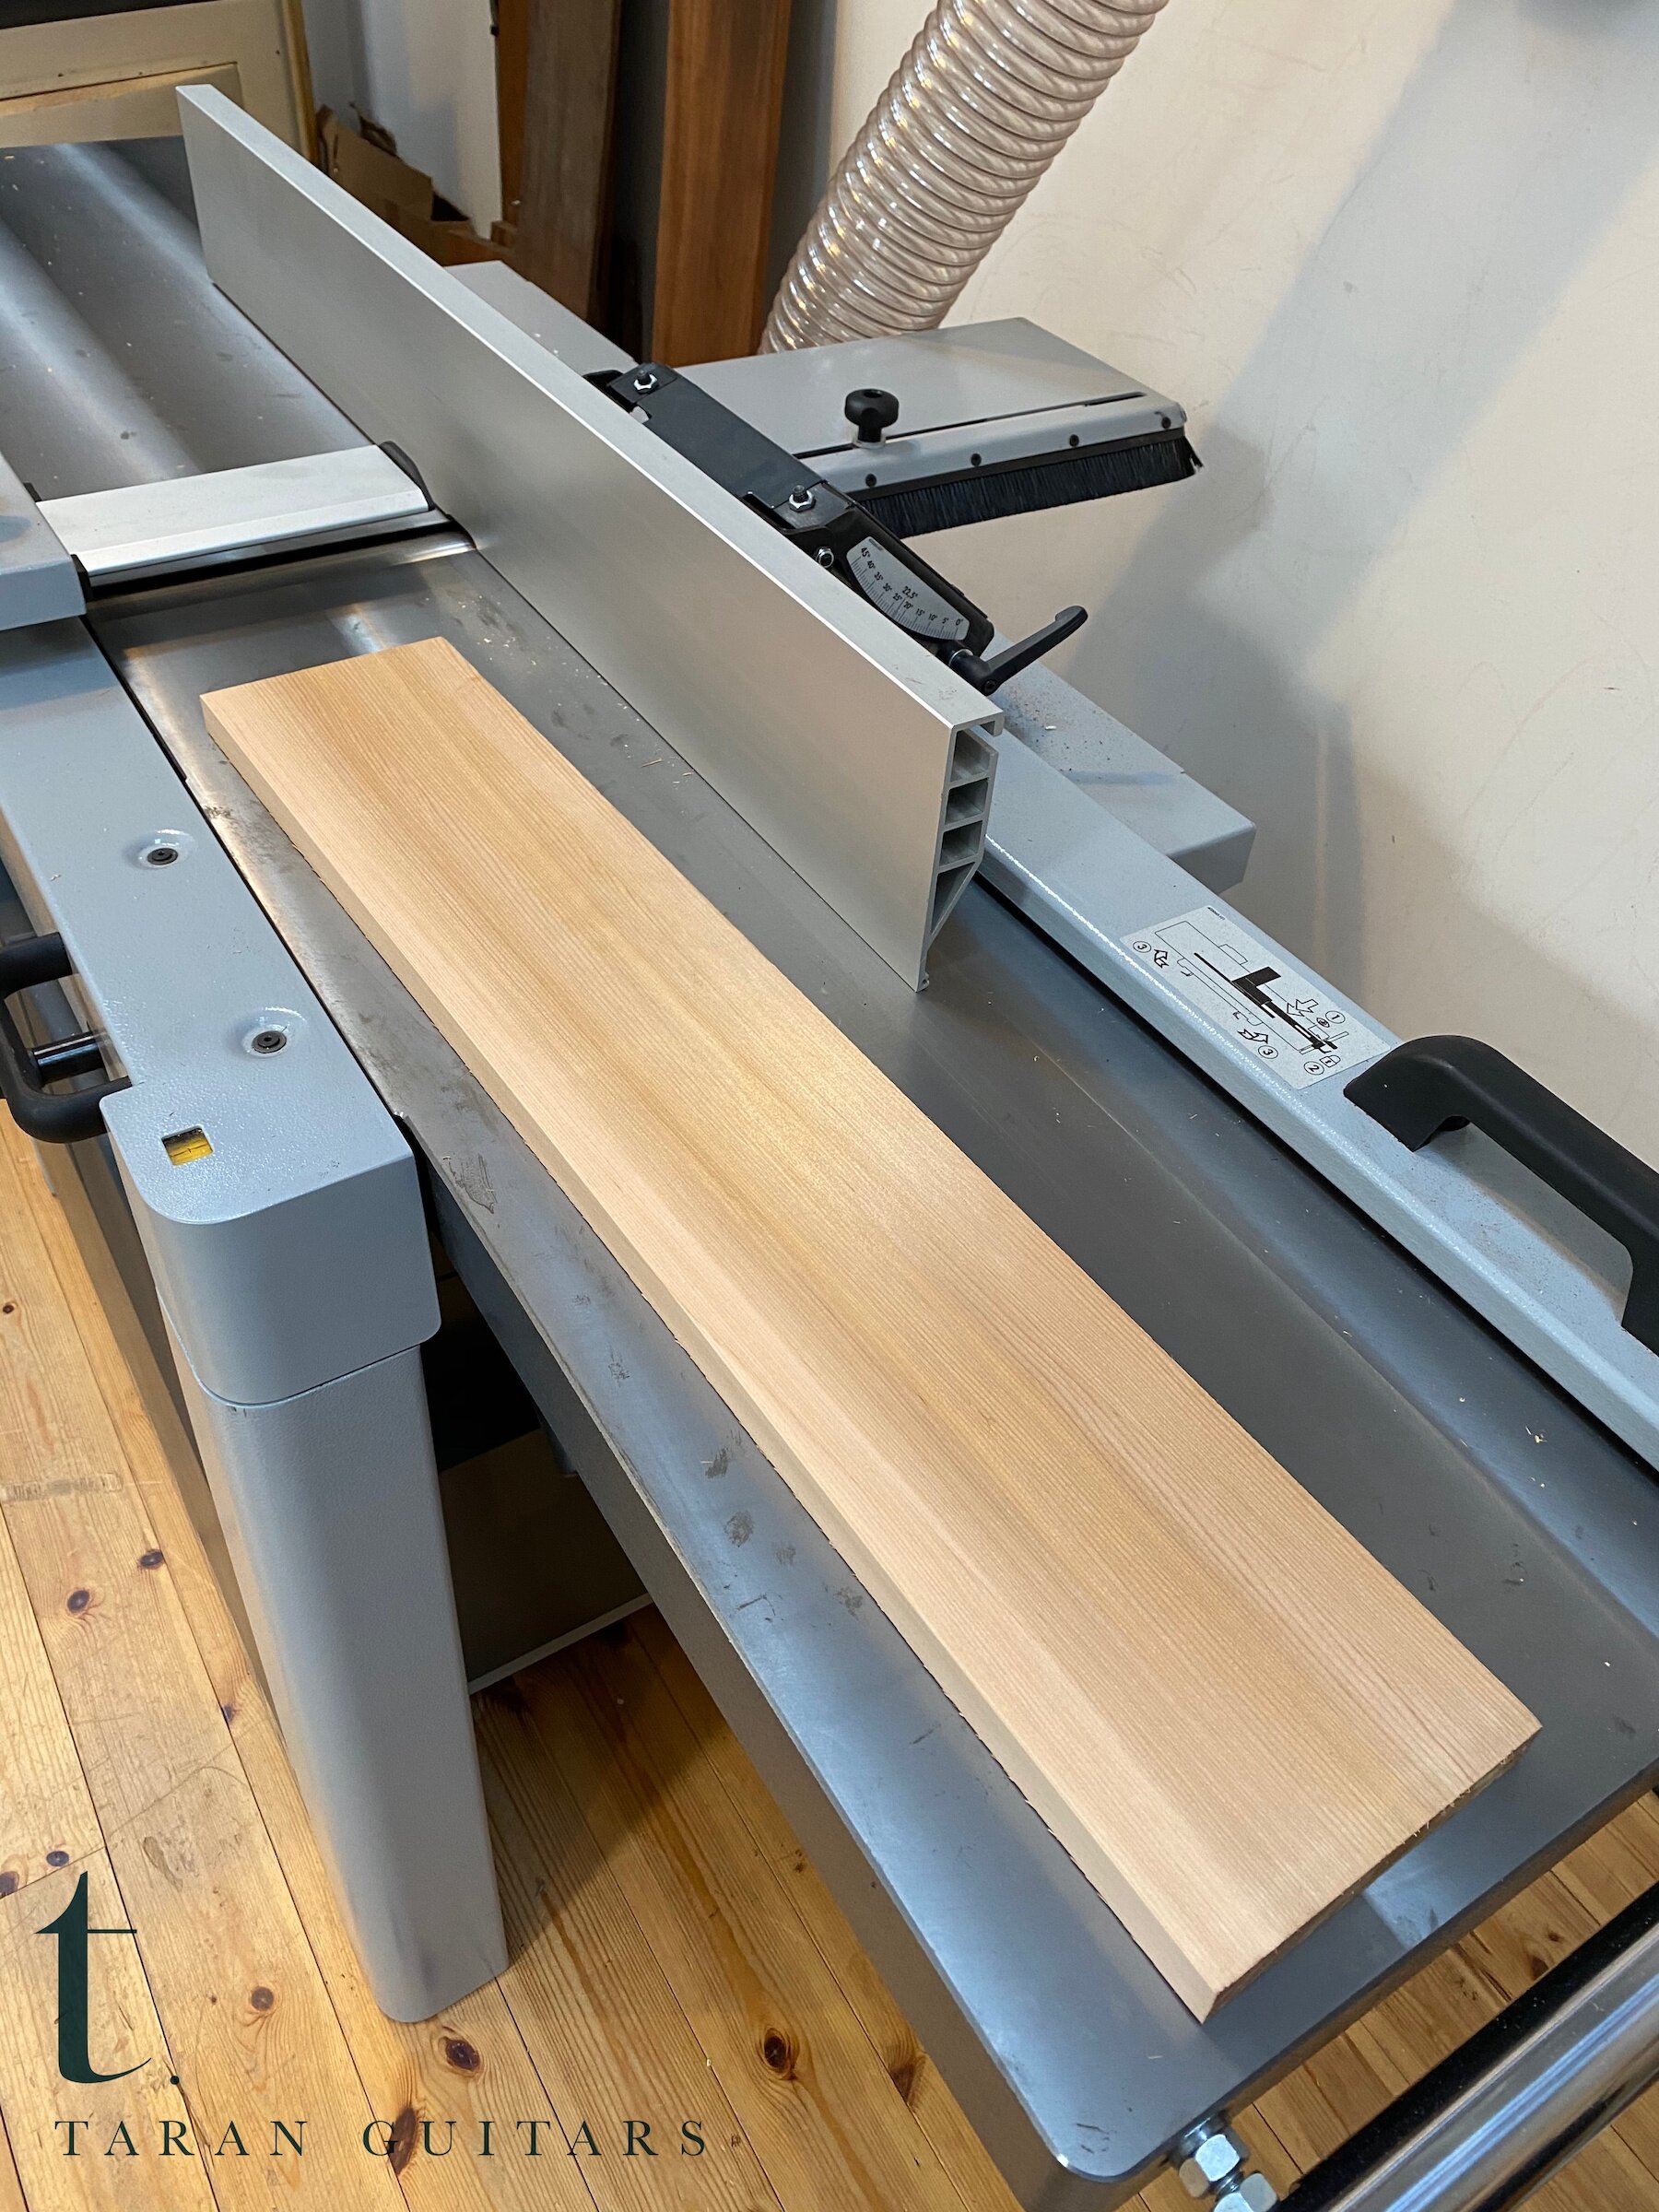
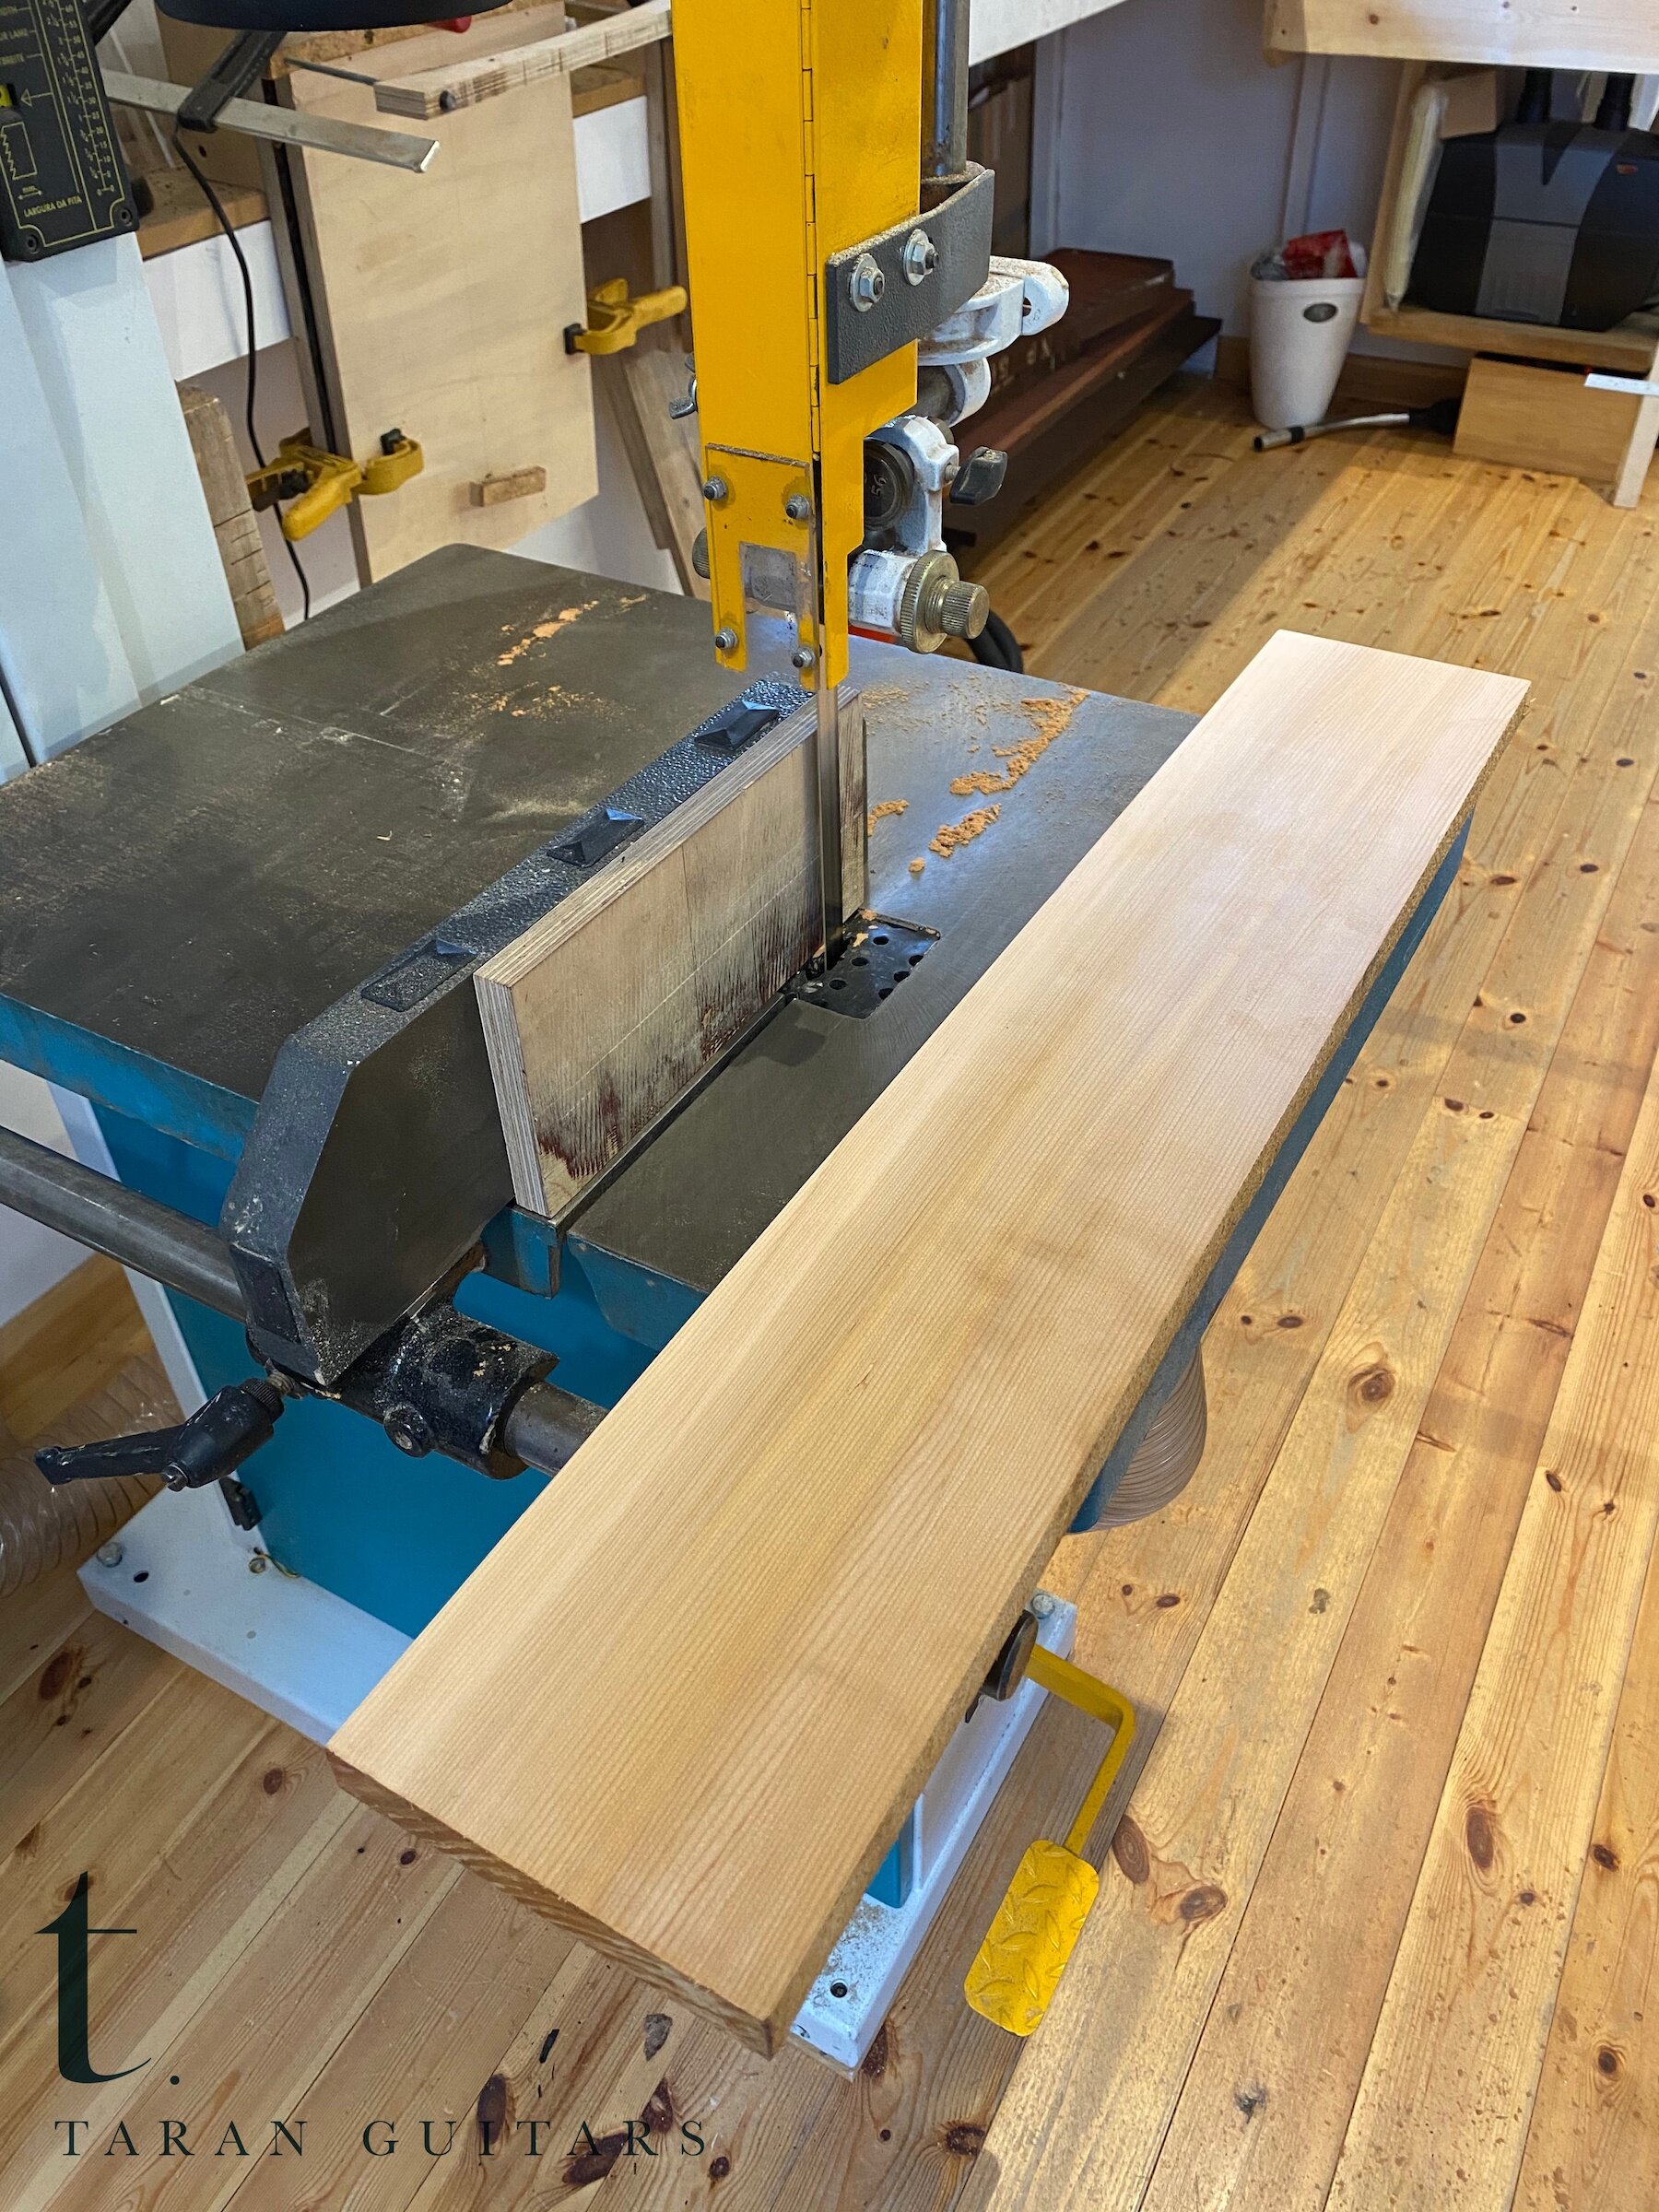
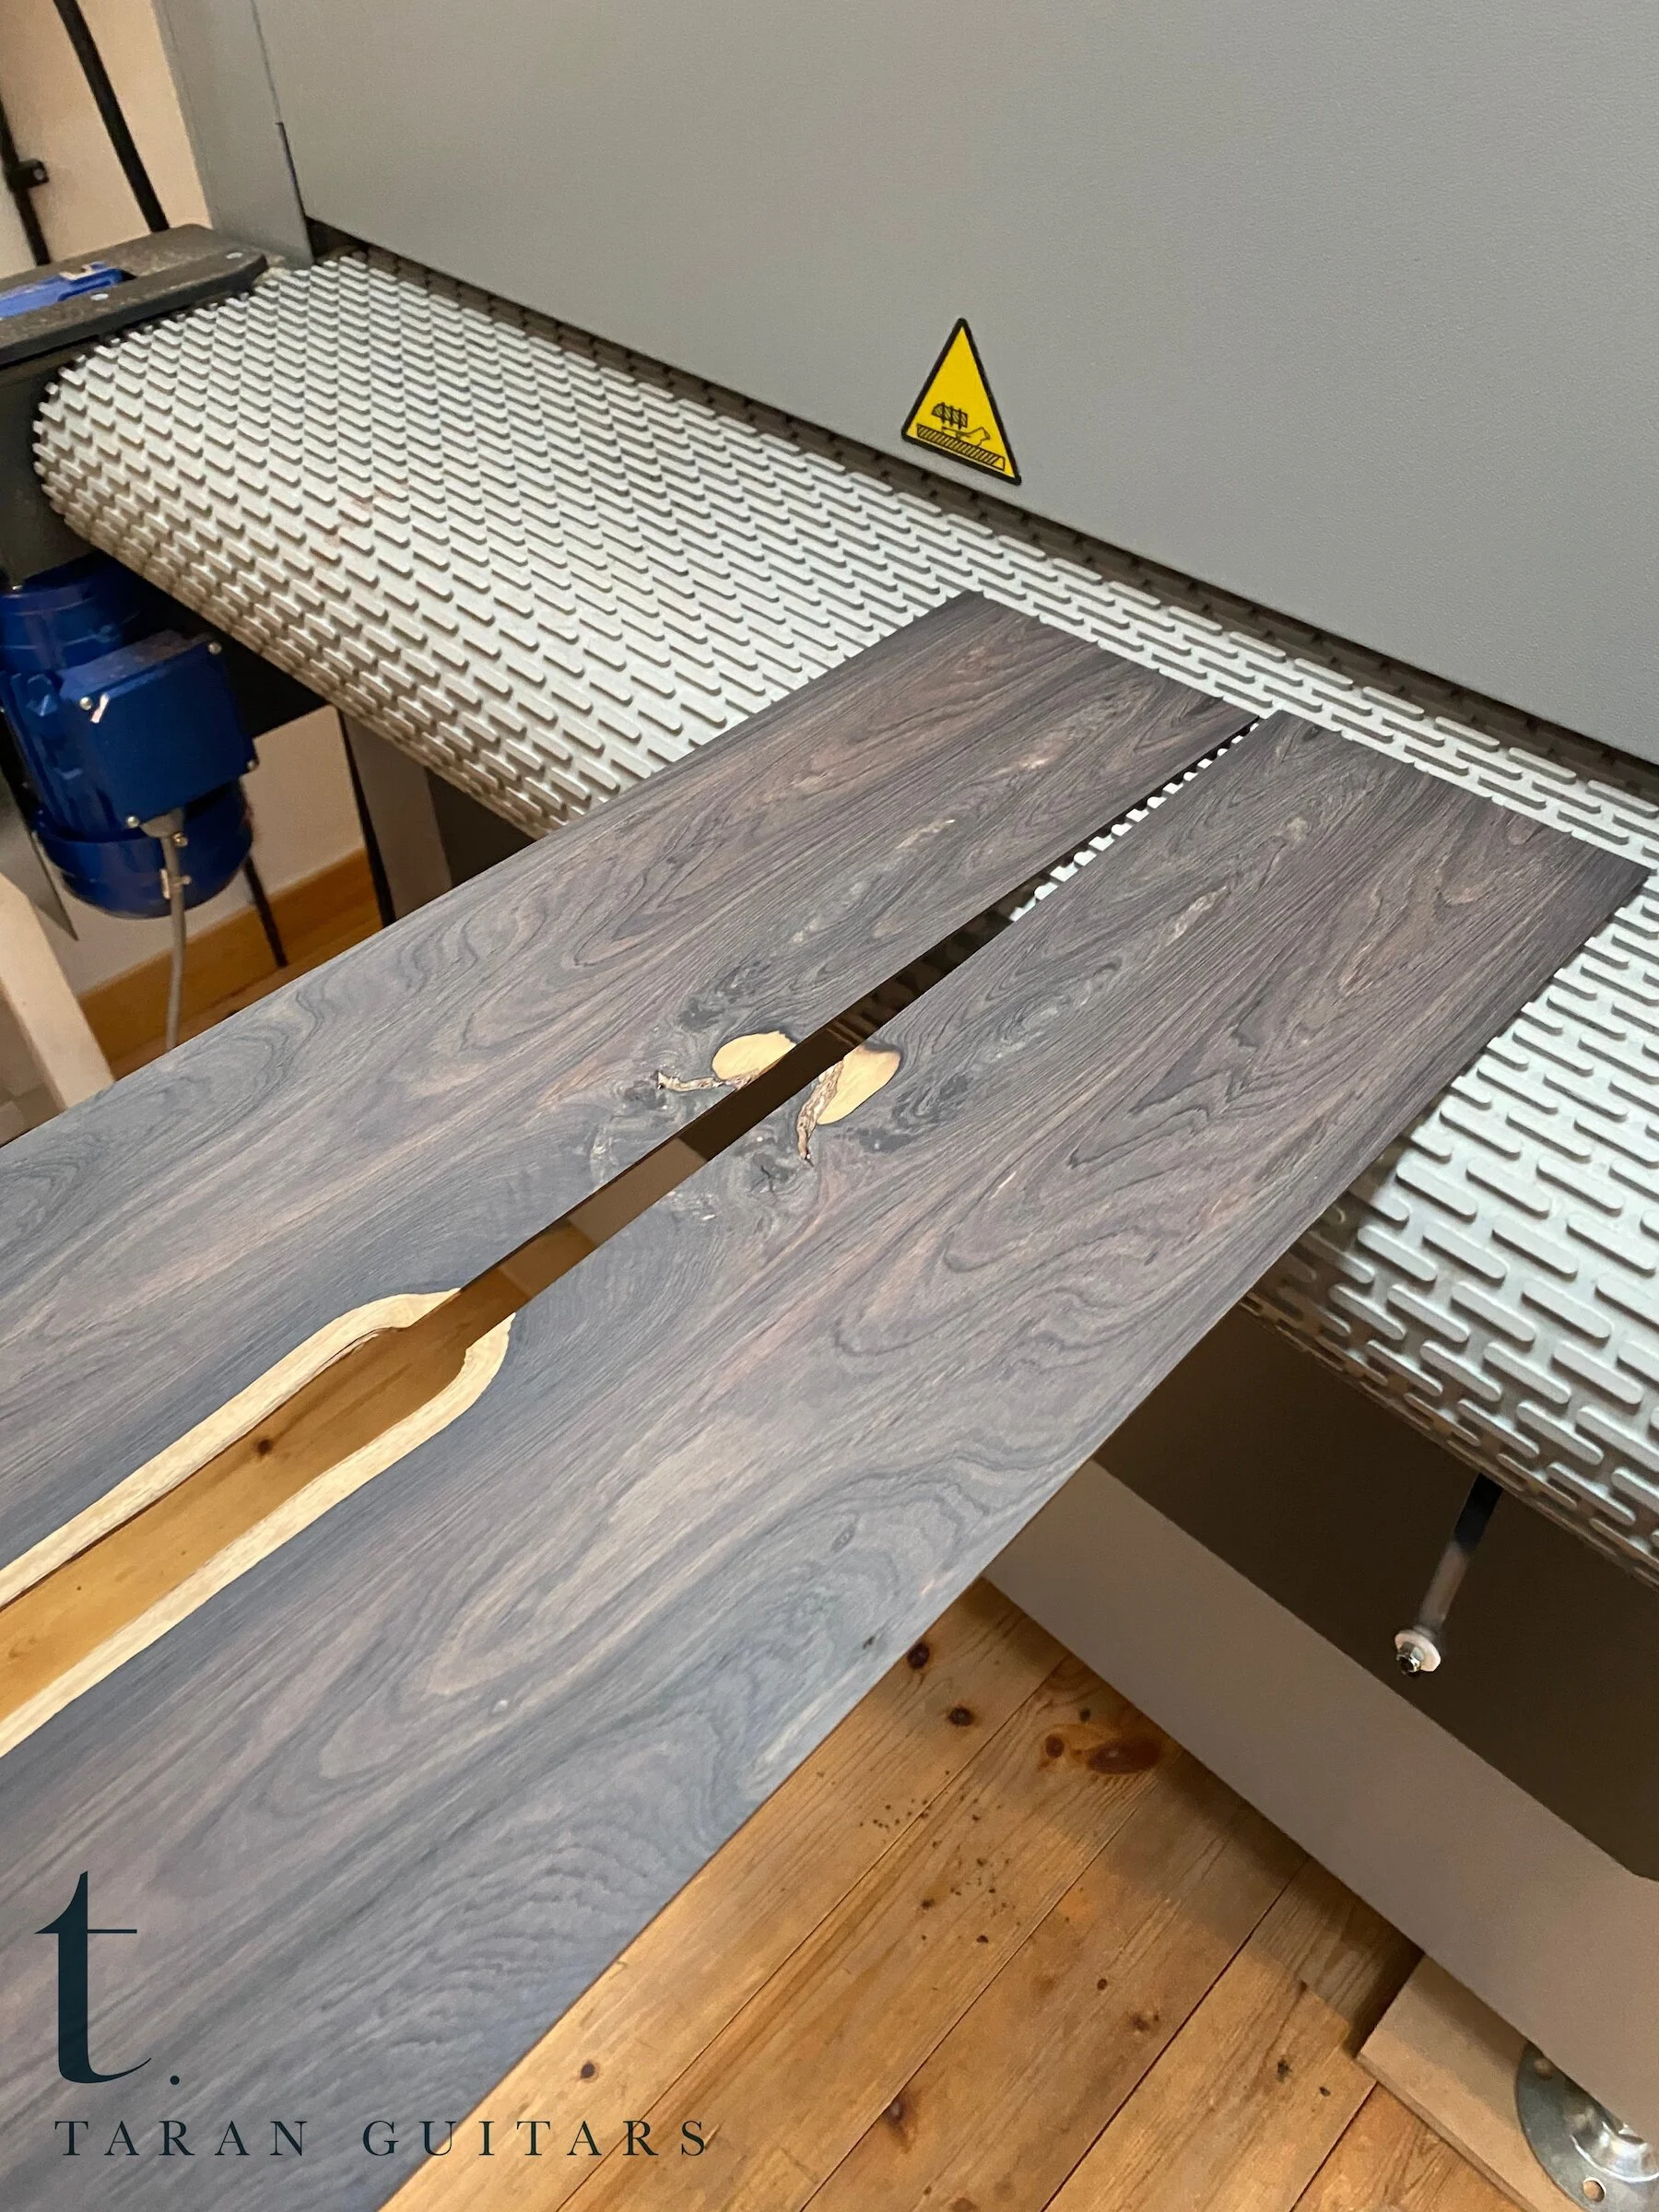
Here are some pictures of the initial stages, prepping the plates and thicknessing them.


Once all the prep was done on the Back, Sides and Front, we were able to kerf the sides and get the back graft on ready for the compression braces to start.


As some of you may know, I do all my side-bending on an iron. ABW is always amazing to bend, you have to be really careful that you don’t over-heat it, the problem is it requires a lot of heat to bend! Once the heat is in the side, you really need to keep the heat in the side like a hot edge moving along the side constantly. This ensures really even bends. You don’t need water to bend ABW because it is so full of resins but I have used it here to speed-up the heat transfer so I do not need to hold it on the bending iron for longer than I need to get it up to temperature.


Once the sides were bent once, I returned to them to do any small adjustments. They are then cleaned-up and laminated to the kerfed Cedar side for the first part of the lamination. We use zpoxy which is a 30-minute cure. I’ve tried lots of different epoxy’s but really like how hard this goes after the full curing time.


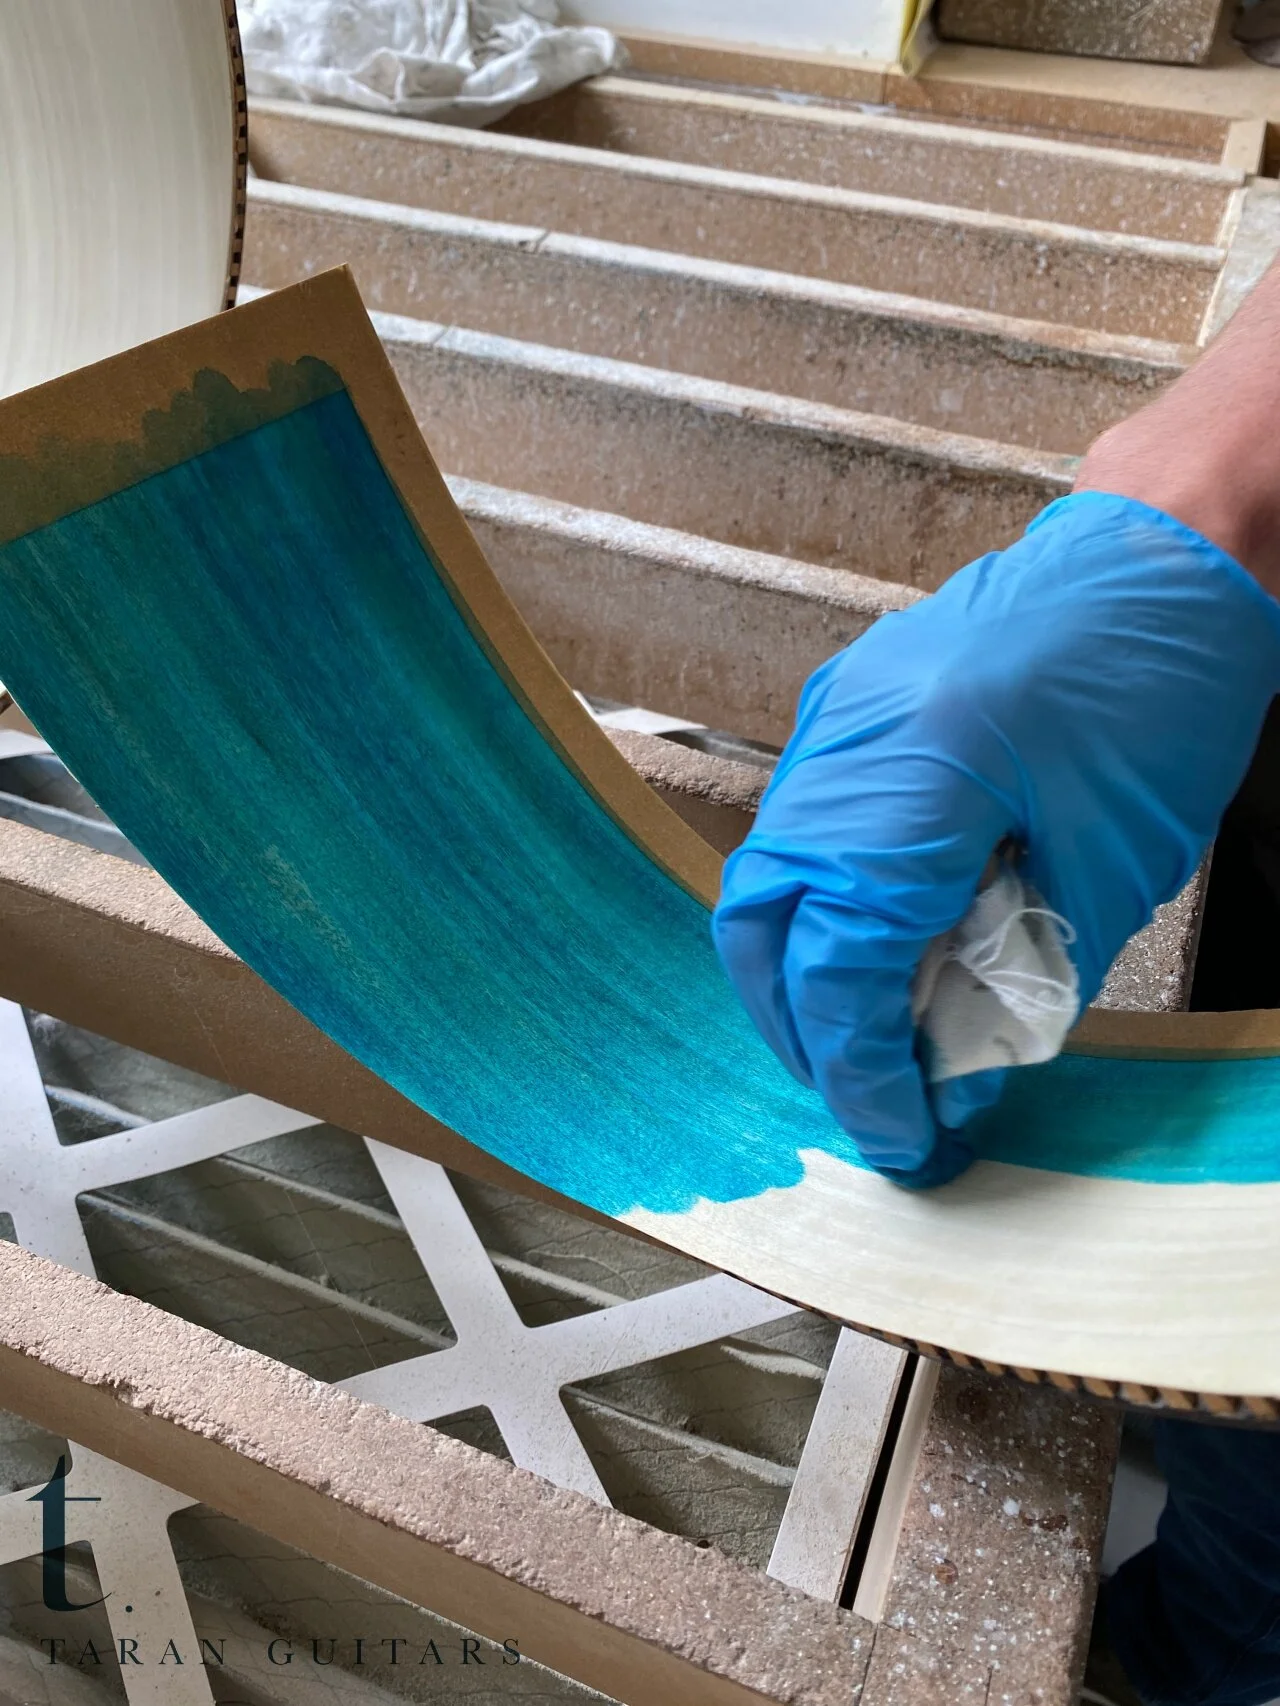
I asked Martin what his favourite colour was, he stopped for a minute and then puzzlingly replied, ‘Kingfisher Blue?’…
Part Four - Side Unit, Soundboard and Back - August 2020
This week (as the post title suggests!) it's been all about the side unit, soundboard and back. If some of you were wondering what we were planning with the Kingfisher Blue, then hopefully this will shed a little light!
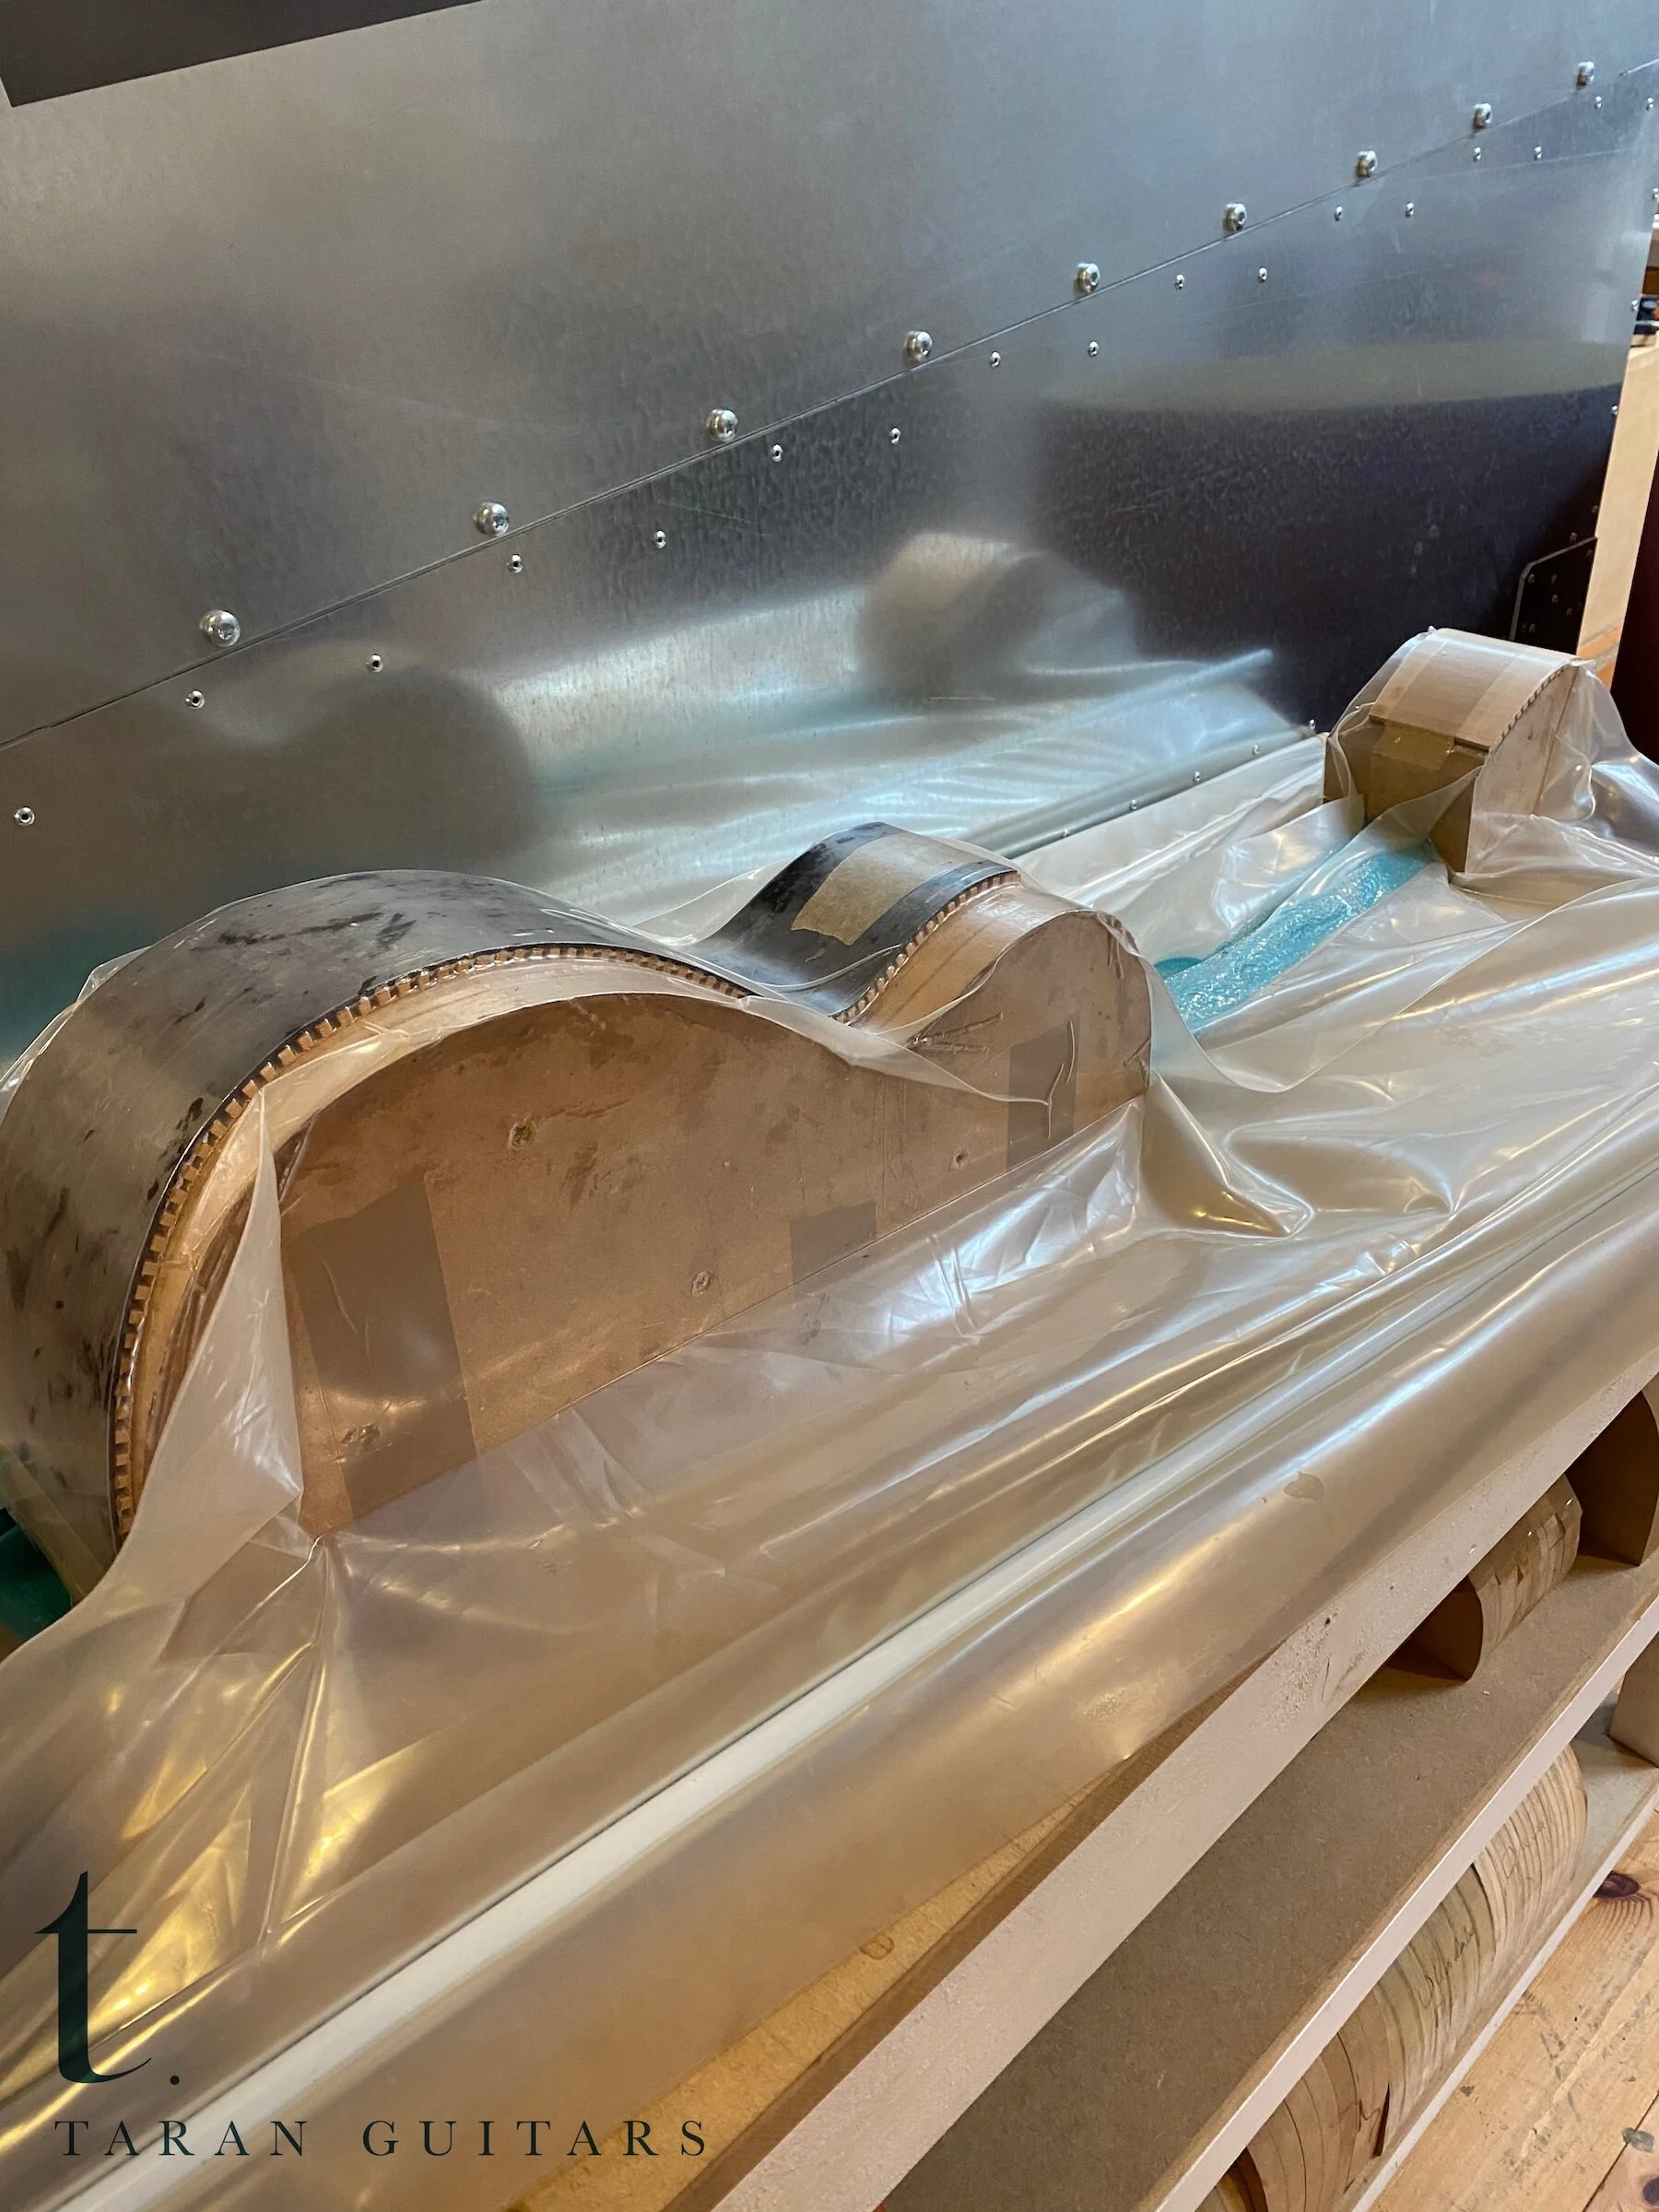
First up was to get the rosette started. I have been using the technique of fading wood with hot sand for the last 4 years, this is an old marquetry technique used to give pieces a 3 dimensional look i.e. with leaves or flowers. I'm sure many of you are familiar with Michael Bashkin's work, he uses this technique too.
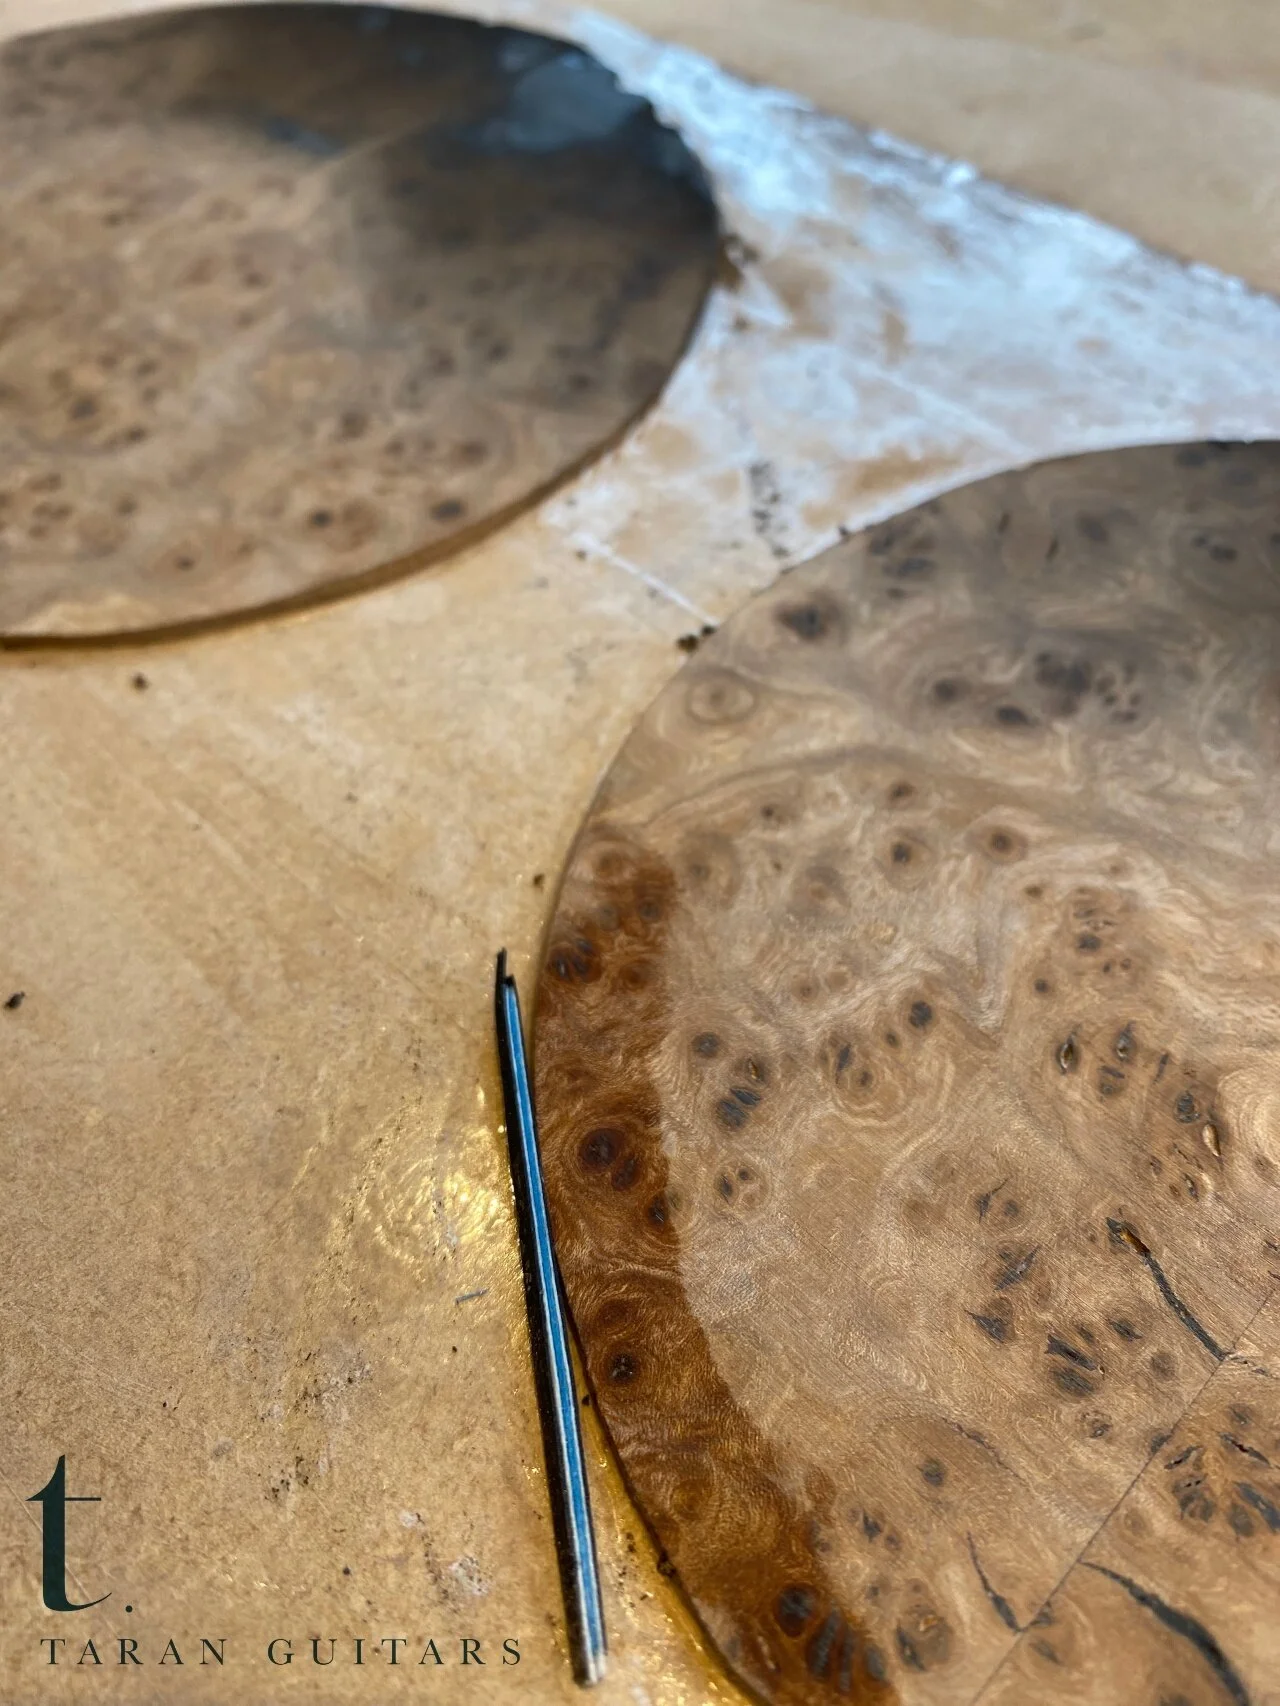


All the major detailing on this guitar will be Scottish Burr Elm. This combined with the Kingfisher Blue has Martin and I jabbering with excitement.


While the various stages of the rosette were taking place, we were also busy staining sides and bracing the back with the compression braces.


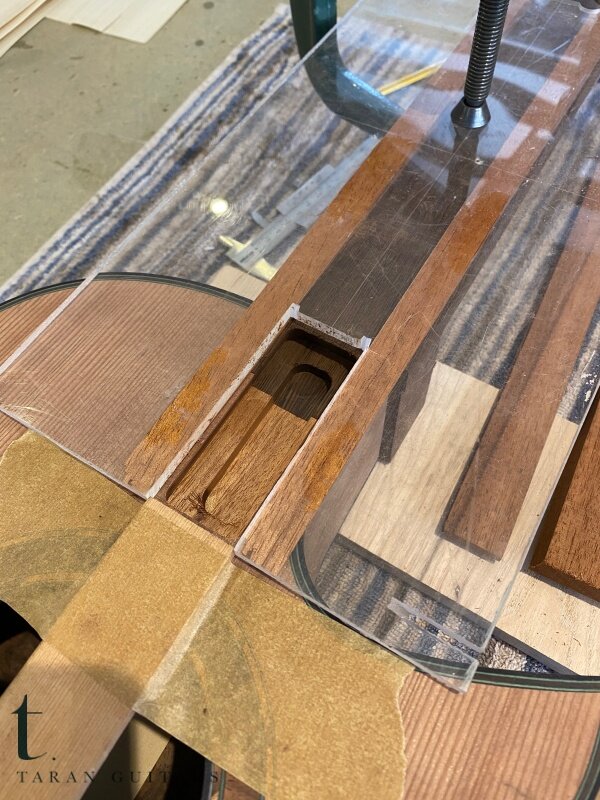
One of the key considerations that any builder has to take care of is wood movement. Wood moves and will continue to move throughout its life. If you know this and you understand what direction it will move, then you can make components that will allow this to happen without affecting the instrument. I apply this knowledge to the neck block.
As you can see from the above picture, the neck block is made up of multiple layers of wood, mahogany in this case. Their direction is crucial to ensure a stable neck joint. There is no grain on the neck block running in the same direction as the back, sides and front. A cross-grain glue joint will always be more stable.


The side unit of the guitar has come together nicely. When doing a cutaway, I have always mitred the joint simply because I love to see the grain run round the corner of the cutaway and I don't bind this area. Although you cannot see this in the pictures, there is a fillet of wood that runs at 90 degrees to the mitre faces, once glued, this makes the joint incredibly robust - kind of like putting a biscuit in a joint - not of the 'dunking in tea' variety!
Once the neck block and tail block are on, the side unit is almost complete. One of the major features that I have changed recently is running a sister lining around the top edge of the rim. This gives the top a hard edge to vibrate from.
Over the last 14 years, I have slowly built-up my collection of key machinery ranging from an Altendorf table saw to a Felder planer thicknesser and wide-belt sander. While all these machines are wonderful, the final thicknessing and tuning of any soundboard and back has to be done by hand.
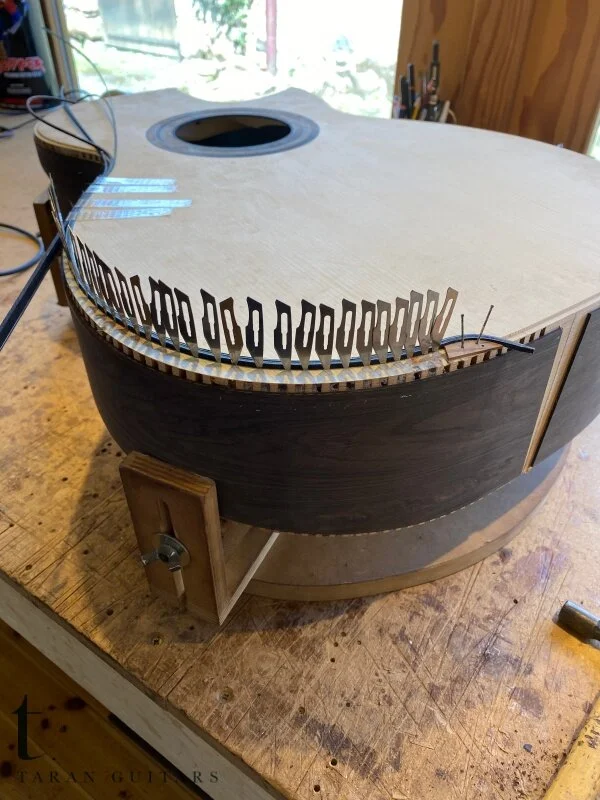
Part Five - Closing Up and Neck on - September 2020
The next part of the build was to get the soundboard braced and fitted to the side-unit and ready for tuning. I'm always amazed at this point at how, with time and patience, you can actually hear the guitar coming to life as you remove material from the braces - the key is knowing when to stop. Martin is looking for a very powerful instrument with lots of separation, not only this but he uses a vast range of tunings from CGCFCD to DADGBE and so on... the guitar therefore has to perform under a multitude of different tensions. The guitar is fan fretted 660mm-645mm, we could have gone more extreme however, I felt that these scales gave us a solid parameter to work within. Getting the balance of everything right at this point in the tuning is critical.
Now all the internals are done. It's time to close the box and start the detailing. One last, but crucial, part to be added is the graft on the edge of neck block. As many makers know, telegraphing between components is something that has to be addressed. Wood moves and larger components like the neck block will become visible through the thin soundboard if there is nothing to stop the inevitable transition of wood movement.


At this point I always feel like the build is really coming on but there's still a lot to do...!


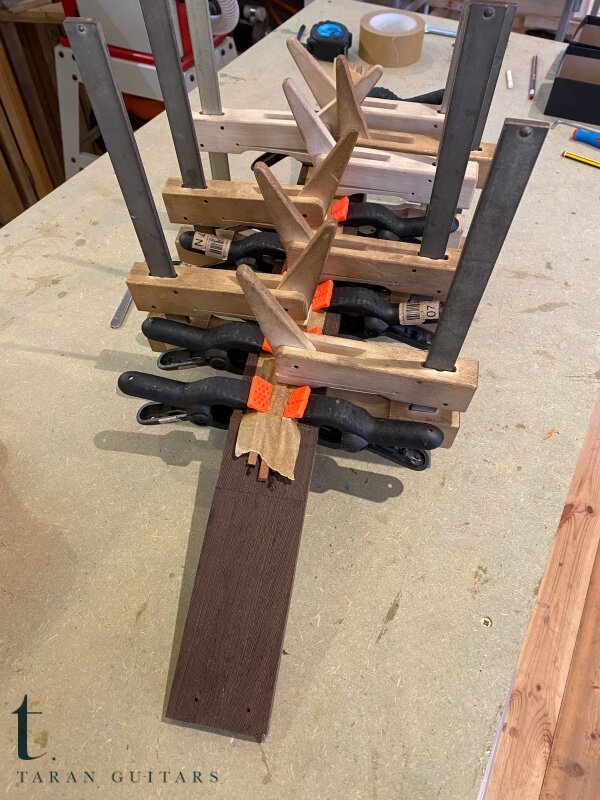
Once the body is bound it is time to put the neck on. Building the neck happens early in the build, in this case the Wenge was machined-up allowed to rest for a couple of weeks before the back-graft went on. This time allows any tensions in the neck to come out and be seen so that we can flatten-off again before fitting. Our neck joint is new, for years I used a standard dovetail joint, while this is perfectly serviceable, I always wanted to develop a super-stable, non-glued joint. Tricky!
What I came up with is this: an oversized mortis and tenon at 44mm wide by 30mm deep, effectively the heel of the neck is inside the guitar but most importantly is the tapered dovetail extension that runs at an angle down into the body. This supports the fretboard over the body while pulling the fretboard down onto the body. To explain, here's a wee video:
Now that the neck is on, we are able to make any final adjustments to its level - something to mention here is that when we fit the soundboard, we also adjust the neck block to the correct neck angle so that the string height is set at this point, not when the neck goes on. This is critical for the neck joint. Martin needs a lot of attack in the instrument therefore to accentuate this, we have increased the string height above the soundboard, if we required a softer attack on a guitar, we would lower this height accordingly.


Now we are ready to get the neck ready for the fretboard. For years now I have been using carbon fibre in my necks like many makers. I find that it helps to eliminate wolf notes in the guitar as it helps to throw the energy back into the soundboard. You could argue that I wouldn't need this with a Wenge neck, however I am of the opinion that if you know it works, use it.
Wenge is an incredibly heavy/dense hardwood. I use this as a neck material on guitars where I want to focus the sound and add power. All neck materials need to be stiff but it is the density that makes the difference here. A lighter wood will open out the sound but for Martin, we need it to be very precise.
The fretboard we chose is 100% FSC African Blackwood, one of the straightest pieces of ABW I have ever had the pleasure of working with. All the fret slots are cut by hand - still trying to work out a jig that will cut fan frets on a saw?!?! Once the fretboard, carbon-fibre rods and two-way-truss-rod are all fitted, it is time to shape the neck. Martin has always liked the soft-V profile that I do, so we went with this. This with my negative-taper (thinner at the 10th fret than at the nut in thickness) makes for a very comfortable neck especially when the nut width is 46.5mm.


Post Six - Pre-Spray Room - September 2020
Here's a few photos of the guitar before it headed into the Spray Room. Really pleased with how it all came together...
POP! First coat of lacquer...
The Final Instalment - October 2020
The guitar was in the spray room for a month while coats of Melamine AC2 cured. There are 9 coats that are applied and between each 3 the guitar is flattened off so that only the grain is filled. This technique of filling with lacquer is time consuming however the results are stunning. Because you are looking into the depth of the grain it makes the wood look 3D which of course it is. Once the grain is filled then the top coats, or hot coats as I call them, go on. These are left to cure and then the flattening and polishing starts. You wouldn’t be talking out of turn to say that finishing is a 3rd of the work in guitar making.
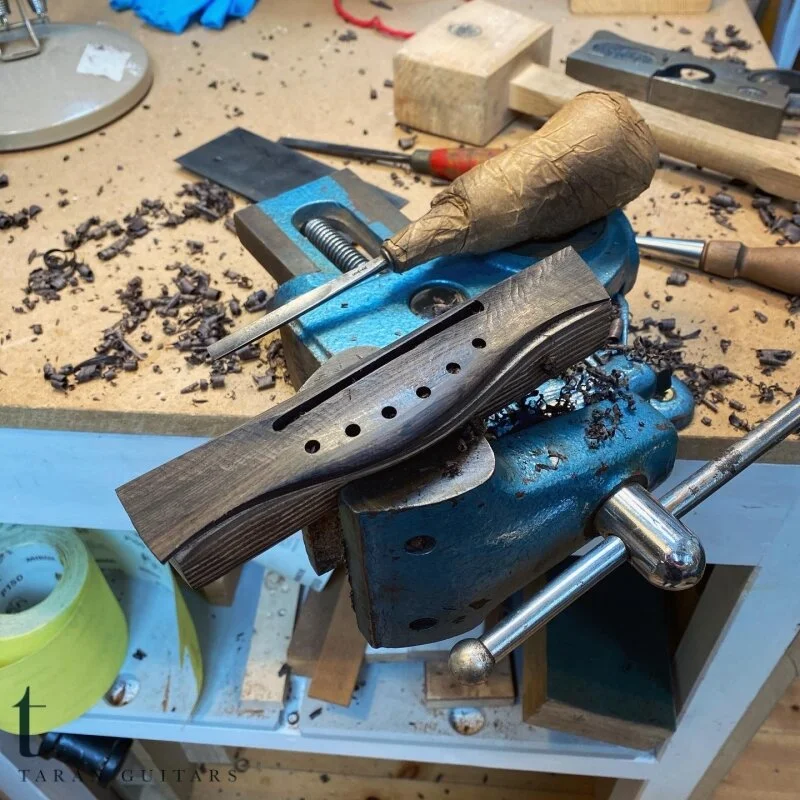
Once the neck is on the guitar is ready for its bridge. I used 100% FSC ABW for this. Absolutely beautiful wood to look at, very difficult to carve however. To my ear it is more lively than Ebony and certainly worth the work.


Final assembly is always an exciting day. The first notes that come from a guitar is, as you can imagine, a very special moment. The guitar jumped to life and the volume was, frankly, mad. Everything was there from day one, it had to settle because it still thought is was a tree, but I was happy. Most importantly for this guitar was the balance across all the registers. Martin plays everywhere on the neck so highs had to be equal to lows everywhere, “No where to hide” as he describes it.
Here are the final pictures taken by my great friend Sean Dooley.


The guitar arrived with Martin, a lot of excited phone calls followed and I could relax!
This week Martin sent over a video for you all. I think it not only shows you the guitar and his thoughts, it also demonstrates how Martin and I work together. There aren’t long complicated discussions splitting hairs over tone, but more what you see and hear, listening and exploring. Long may it continue! Thank you Martin!